How I do inlay
Big projects | Inlay photos

Hello and welcome—I apologize for my tardiness in sending newsletters. Then again, I’m always curious if readers find it a friendly reprieve to go without a newsletter every now and then? Like the reprieve us introverts feel when a friend cancels plans last minute.
A brief update: I’m working on a couple big projects right now. One is in writing, which is leading me to excavate years of past journals (I’ve kept a journal since I was 10, though there were some months-long breaks in there). Apparently I used to write sonnets. I have no recollection of doing this, but my journal remembers. Who knows what else I’ll find.
In woodworking, my big project is a commission for friends—a large storage cabinet and a sink vanity for their bathroom. Am using birch and walnut. Never worked with birch before but I really like it—beautiful light wood with these occasional speckles and deep reddish-pink heart wood.


Some family issues have come up and delayed my ability to get down to the farm to work on the cabinets—it’s tough to pause, and perhaps I’ll write about that at some future point when I’ve become all enlightened and philosophical about it. At this moment though, I feel a mix of stress (not getting something done when I said I would) and gratitude (that our family is able to help, that my friends who are waiting on these cabinets are gracious about the delay). And I’ve been thinking a lot about plans and self-stories, how we make them and tell them and it gives us this sense of control that is actually illusory.
In the average day to day, it’s hard to realize just how little in control we are of what is about to happen. For me, this isn’t a case for a throwing-my-hands-up, nothing matters, apathy-first approach—I’m going to keep making plans, working toward an end result, and all that. I’m just holding it all more loosely, so that if (when) it slips out of my planful grasp, I’m not twisted up in despair.
Photos and some light explaining of how I do inlay are below. I hope the next couple of weeks find you staying cool despite the heat. ❤️
How I do inlay
I quite enjoy doing inlay and wanted to share the process I use, but first, caveats!
I’ve only been doing this for a year. The process I’m about to share was all learned from one man: Mark Laub, who offered a couple of workshops that I attended last year. He’s a fabulously talented woodworker whose inlay is way more skillful than mine will ever be and you should visit his website and drool over his work.
If there are other techniques, I’m ignorant of them, as the rest of my learning since those workshops has been hands on in my own shop. So take everything I say with a grain of salt and if you get the opportunity to learn from an actual master, I’d highly recommend it!
On with it.
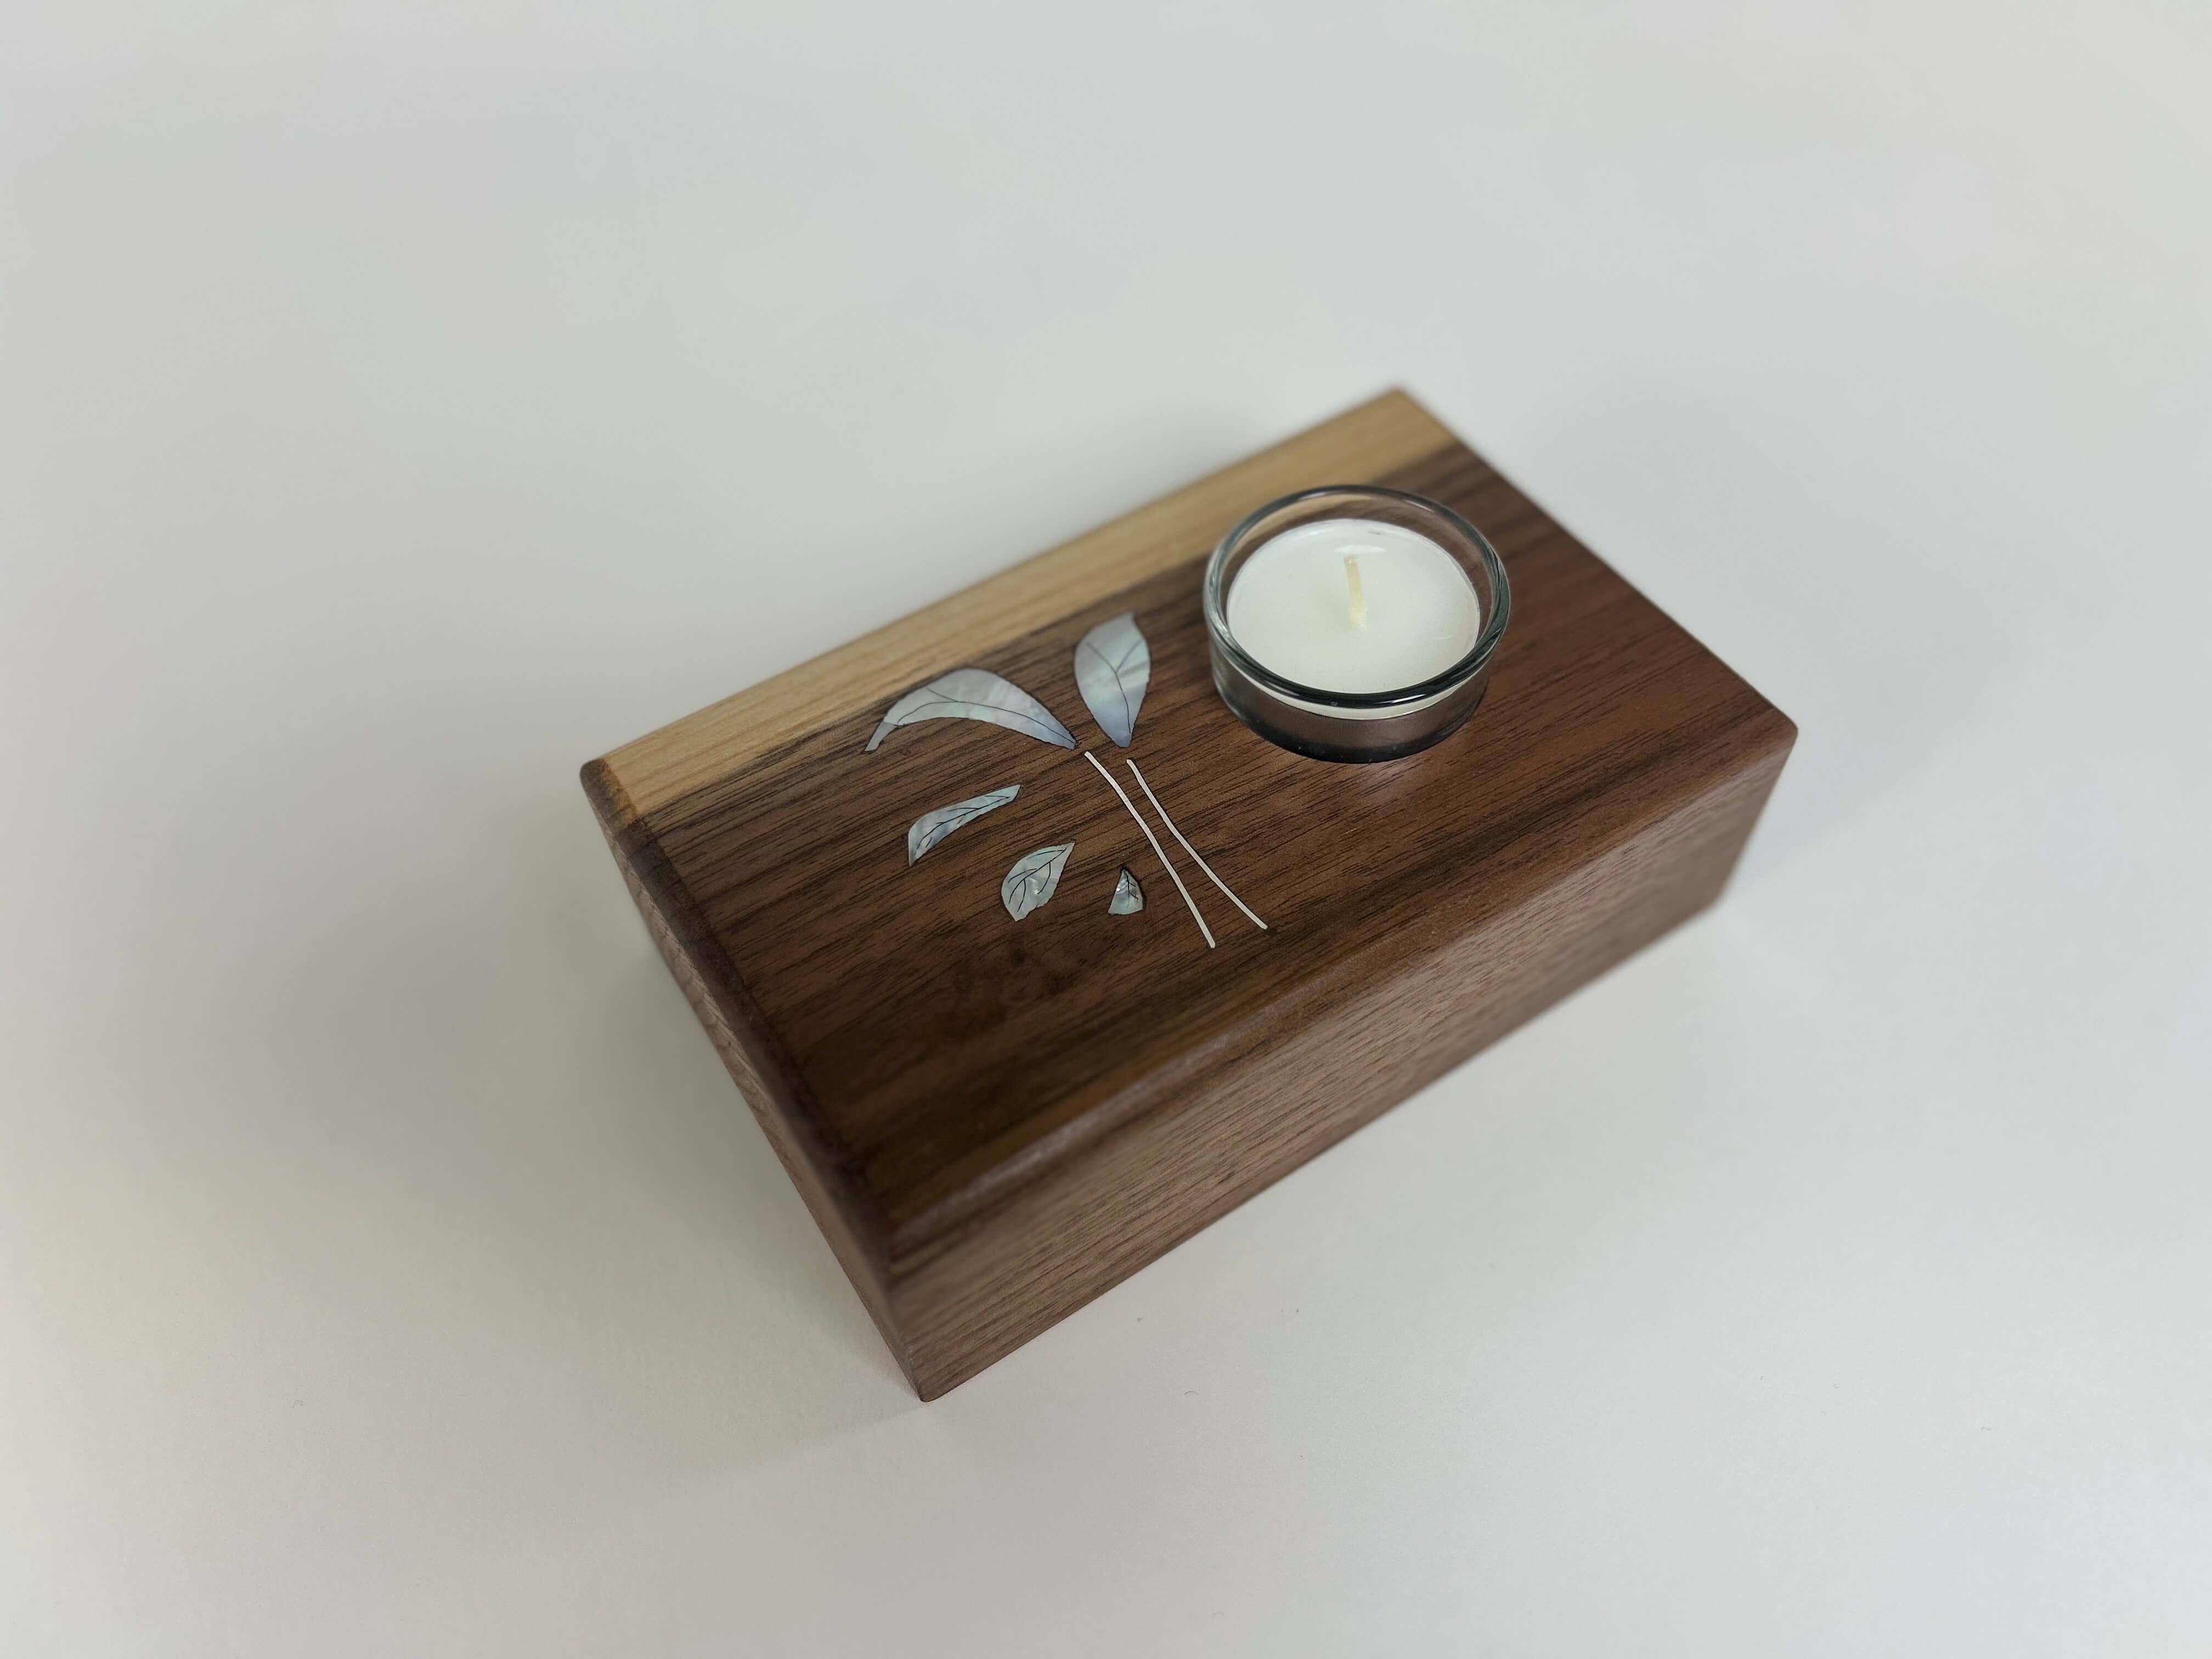
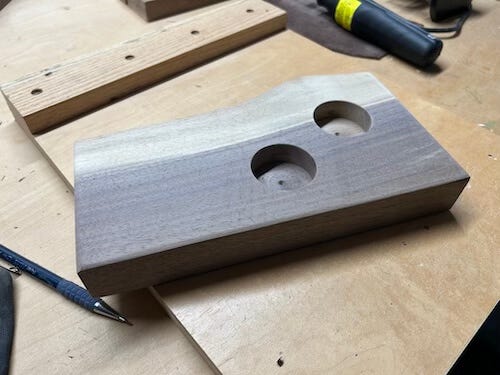
To begin, I started with a blank—in my case, a 2” thick piece of black walnut that I’d cut into roughly a 3–4” x 9” long block. I cut a 1 5/8” hole in the blank with a forstner bit to fit candles. I left one side of the block free for a design.
Then I sat and looked at the piece of wood for a long time. Walked around, tidied my shop, ate a snack.
I don’t know how the creative process works for you, but mine is like a male Bird-of-Paradise, hopping around the object of my desire for quite some time.

Finally I decided I was thinking too much and the obvious answer for someone with my skills was organic shapes. Flowers, leaves, that sort of thing, because they’re more forgiving. Nature doesn’t come in hard, rigid lines that have to be just so.
I designed a couple of leaves with stems, thinking I’d make the leaves out of mother of pearl and the stems from dead soft silver. After creating the design, I drew the leaf outlines on my mother-of-pearl so that I’d know where to cut.
(Note: If your design is quite intricate, draw it on paper, transfer that to tracing paper, and then use carbon paper to transfer your design to the inlay material. It’s best to think of using smaller pieces to create a larger design rather than attempting to cut out a large, intricate design from one piece and inlaying that.)
Unfortunately I didn’t think to share this how-to post until I’d already cut the initial leaves, so I have no photos of the blank before I cut and inlaid those initial two leaves and stems you see below.


The piece needed more than just those two leaves, so I looked through my little scrap pile of pearl and pulled out some smaller pieces to cut into little leaves.


Above is the coping saw I used for this project. If you’re cutting mother-of-pearl, please do not use a coping saw with a big-ass blade like this. This is a terrible way to go about it! The cut is big and kind of ugly. This is not the right tool for the job. Unfortunately, at the time, I didn’t have a better saw. I’ve since corrected the error of my ways by purchasing a jeweler’s saw, which works way better, is much lighter, and easily fits the higher quality blades I have.
(Note: I forgot to take a photo of the pearl cutting jig I use—you could easily make one, but the one I have is this one from Stewmac.)


After I had the individual pieces, I laid them out on my wood and repositioned them the way I wanted. Then I traced around each piece with a pencil so that I knew where to remove material.
(Note: Mark taught me to use cement glue to adhere each of my inlay pieces to the wood and then take a exacto knife and actually score the lines around the individual pieces. I did that with other candle holders, but didn’t with this one.)
Then I put a 1/32” downcut spiral bit in my Dremel tool and the tool in a plunge router base. I set the depth on the router to remove only as much wood as the thickness of the pearl, then carefully removed the wood inside my lines. I started by cutting the outline first and then moved to the interior.
This is the time for really slowing down and moving the wood any which way you have to for the best sight lines. I kept my vacuum running next to me to clean out the dust that was created. I regularly checked the space I was creating with the piece to make sure I wasn’t taking too much material.


I got my CA glue and used that to adhere the inlay pieces to the wood. I checked for any major gaps between the pearl and the wood and filled those in with brown wood putty (I’ve also used heated wax). Once that was done, I lightly sanded the top, removing excess glue. I worked my way through a variety of grits of sandpaper (I believe I started with 80 or 120 and went up to about 400).


Once that was done, I let it sit for a while. Then I took my scoring tool and put a few leaf lines in the pearl pieces. I filled those with black engraving filler. Finally, I glued a little piece of turquoise in the bottom of the candle hole—the forstner bit makes a slight impression in the middle of the hole and I figured it would be nice to fill that.
And voila, that’s it!